Friday, April 22, 2011

Easter Printable

I'm last minute in posting this, but thought I would share it anyway.  Just click on the pic, copy and paste into word, and size to your liking.  Enjoy!

Saturday, April 9, 2011

Wheatgrass People


We took the instructions on growing wheatgrass from 320 Sycamore and gave it a twist!  Our diy version of Chia Pets - mason jar, googly eyes, hot glue, soil, wheat, water & sun.  The kids love watering it everyday and are excited to give their people their first "haircuts".

see the parties I link up to in the sidebar...

Monday, April 4, 2011

PROJECT: craft

Last month, my excellent friend Sarah and I attended a local community craft night entitled "PROJECT: craft."
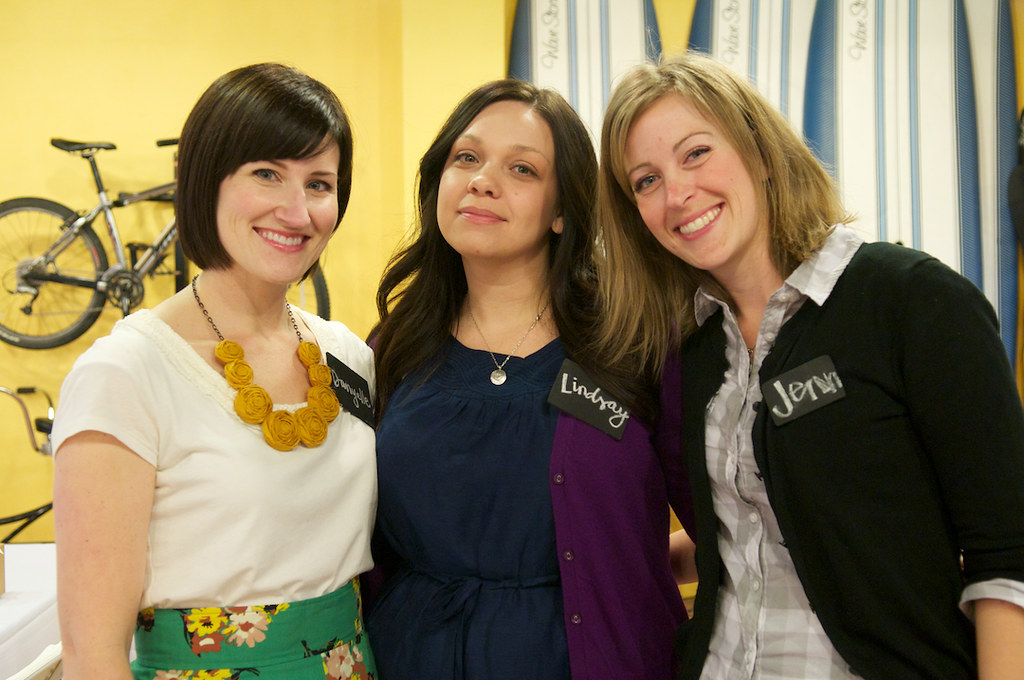
It was hosted by two local crafty bloggers, Danyelle from dandee and her friend Lindsay, at a local shop called Greenies, which is owned and run by Jenn and her husband from Ruffled Sunshine.

Our tickets arrived in the mail about a week before the event and had us giddy.

The actual night was a thing out of a magazine. We were greeted with nametags,

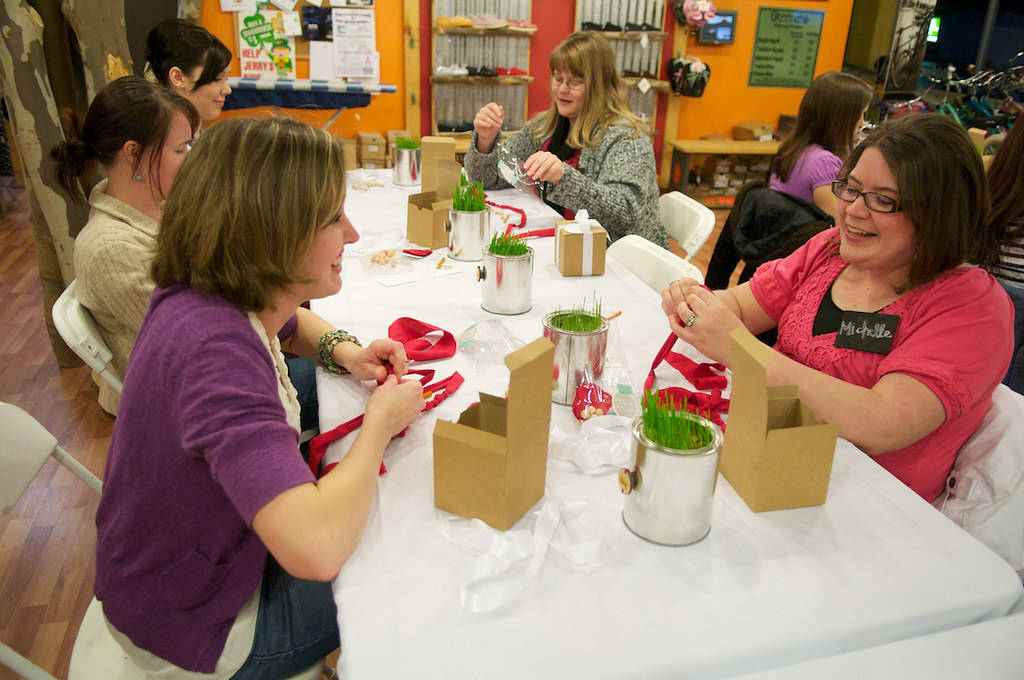
Seated at these gorgeous tables,

and put to work on these darling craft kits in boxes. A fabric necklace made with wooden beads.

There were little desserts to die for,

Giveaways galore,

and time to work on our own projects after. 
I promise I was much happier than I look in this picture!

Upon our exit, we were treated to a favor bag with a cd featuring the music played for the night (courtesy of the Passionista), and cards from the giveaway sponsors,

a scrumptious cupcake from Sweet P Cakery,


Here we are post-party.
We loved making new friends there and are excited to go again in the fall!

all images (excepting the last) taken from dandee

Sunday, March 27, 2011

crafternoons

This winter, my friends and I have been getting together every Thursday afternoon for what we like to call "crafternoon".  It is a time for the kids to play and for us to craft away on whatever we've got going.  We work, chat, munch on treats and laugh a lot.  I have loved it.  I have not snapped any pics of us yet, but Amy has.  I'm really lucky to have the greatest of friends.

good times at church.

I've had such a blast helping out with our ward activities.  At Christmas, we did the Polar Express.  Around Valentine's Day, we had ward adult-only dinner groups, meeting at the church for dessert. 


I tried to create ambiance with flameless candles, red and lots of chocolate.  We served cheesecakes with chocolate ganache, and red velvet cake.  We played Frank Sinatra.  It was lovely.

Last week we hosted Movie Night.  Each of the youth groups made a home video, recreating a scripture story.  We invited the whole ward to come watch and eat popcorn and licorice.  It was awesome.  Everyone loved it, and I was majorly impressed by our youth and their creativity.

Thursday, February 24, 2011

Baby for Brandaige


About a month ago, I got to host the first baby girl shower in quite a while!  It was given for my good friend, Brandaige, who after having two boys was expecting little Greta. 


One of the games we played was a spin-off of a game found in this post, which I loved.  It was to guess the names of the children's book characters that I had framed as a gift for Brandaige - all girls' book characters.  It was so fun for me to speculate what books we would be reading around here if I had a girl!


The shower was a brunch.  I provided chicken salad croissants...


and cinnamon roll cupcakes.  I also filled candy dishes with lots of pink and brown candies, since those were the colors of Greta's nursery. 

As usual, I ended up talking/hosting too much to take many pictures once the party began, but I did manage to snap one of the girl of honor.

Thursday, January 20, 2011

Free Valentine's Printable

I just finished watching Pride & Prejudice (the long one) for the zillionth time, and it put me in the mood to decorate for Valentine's Day!  Here's a little quote from Mr. Darcy for you...just click on the picture, download and print!  It will give you a great quality print up to 16x20.  And Costco printing is cheap!  Enjoy!

linked up at:


giveaways


UndertheTableandDreaming

Sunday, October 10, 2010

The Stewart House of Haunts


Welcome, foolish mortals!  I'm here to give you a peek into our haunted house, and hopefully share some thrifty tips for making your house boo-tiful this time of year!  This door sign I crafted digitally using Haunted by My Mind's Eye, and mounting it with Mod Podge on a wooden sign painted black I found at a local craft store.


The mantle - a picture of last year's Halloween costumes, spooky lighted garland and candles, and a newly-made "Boo" sign out of vinyl lettering, backless frames and Halloween scrapbook paper. Oh, and some spiderweb fabric draped over the mirror.

I fell in love with the Halloween countdown calendar from Pottery Barn last year and wanted to re-create it for cheap. It definitely turned out to be a labor of love, but the kids love it and so do I!

I loved House of Smiths' Halloween candy jars this year, so I did my own version!


I added some Lizard Tongues...


and Witch Warts, which have been suspiciously disappearing...


Almost all of my lamps have been draped in spooky spiderweb fabric.  I love the effect.

I made some more Halloween pillows this year...I couldn't pass up Targets cute placemats & tablecloths, so I butchered them and made covers for my pillows, and table runners for my piano and dining table!

I fashioned some deadly black flowers out of fabric and attached them to the pillow cover.

Gotta love the dollar store black crows - here's one perched in my fall foliage. 
You also gotta love the dollar store pumpkins...I spray painted mine off white and hot glued a fun ribbon around it.


Every year we have what we call "Halloweekend" with my parents and sister's family in early October.  The girls do a Halloween craft as part of the fun...here's what we came up with this year, inspired by Li'l Luna.

I change these frames above my cupboards seasonally...here is more of Haunted by My Mind's Eye.


A shot of the dining room...runner made from Target tablecloth, black cake plate made from a black bowl and plate, dollar store pumpkin & moss, and Target creepy bird and tree decal.  The magnetic chalkboard I made from a large piece of galvanized sheet metal (found at Home Depot), chalkboard paint, and framed out with decorative foam molding from Lowe's that I spray painted with Heirloom White by Rustoleum. 

 
Bo-Bo Bones guarding our home office! We made him a few years ago out of paper plates!  

 
Simple Pumpkin topiaries, and my old autumn wreath made over by wrapping a cheap autumn garland around the old one! The bats for the bat cave were created with stiffened black felt, but you could use black cardstock as well! Here is the template.

 
I used a chandelier decal from Target and a black cat silhouette from Martha Stewart to create this spooky scene.

Thanks for visiting the Stewart House of Haunts!  Until next year!

Sunday, September 19, 2010

Kids' Halloween Dish Towel Aprons


These are so easy to make, you just might want to make one for every holiday!  To make one, you will need:

1 new Halloween dish towel (I would avoid the terrycloth kind)
2 yards of coordinating ribbon
coordinating thread (plus needle or sewing machine)
*if you want to add embellishments, try rick rack, felt to cut into ghost, bat, spider shapes.

1.  Lay out your dish towel and establish the "top" of the apron.
2.  Make a template of a right triangle (I used cardstock) that is approx. 3"x9".
3.  Place the triangle upside down (3" at the top, 9" at the side) lined up with one of the top corners of the apron.
4. If you trust yourself, cut the towel along the diagonal line of the triangle while holding the template in place.  If not, trace the line lightly and then cut.
5.  Repeat steps 3 and 4 for the opposite top side of the apron.
6.  Fold the cut edges over 1/4" and press with an iron.  With your sewing machine (or a needle and thread), sew along the folded edges.  I used a zig zag stitch to prevent fray, but you could use a simple straight stitch.
7.  Cut your ribbon into 4 18" pieces. 
8.  Sew one ribbon to each of the top corners of the apron.  Sew the other two to the middle sides (the other end of your newly sewn seam).
9.  To prevent fray on the exposed ends of the ribbon, take a match or lighter and GENTLY hold the ribbon above the flame until it melts it and seals it.
10.  Embellish as desired!

I'm linked up at:


Join us Saturdays at tatertotsandjello.com for the weekend wrap up party!


Wednesday, March 24, 2010

Attention Fabric Lovers...


Oh, danger.   DANGER!!!  Oh, the danger of reading other creative people's blogs.  Lindsey over at The Pleated Poppy has just introduced her readers to Hawthorne Threads - an online fabric (and more!) shop that has taken my breath away with its darling factor.  Oh!  I am so in love.

I won't bother to re-invent the wheel but instead will send you over to Lindsey herself to sell you on why the shop is so great.  It's worth a look.


One thing she doesn't mention, however, is their incredible selection of patterns.  Amy Butler, why oh why must you tempt me with your darling patterns?  Now I have to learn to sew FOR REAL!